Boosting Home Values With Beautifully Refinished Hardwood Flooring
We don’t usually include DIY projects like refinishing your hardwood floors, but this “how to” from guest blogger, David Glenn, explains the entire process perfectly. So for those of you who like to get your hands dirty, have at it! For the rest of us, read on so you’ll know what to expect when you have your floors refinished professionally.
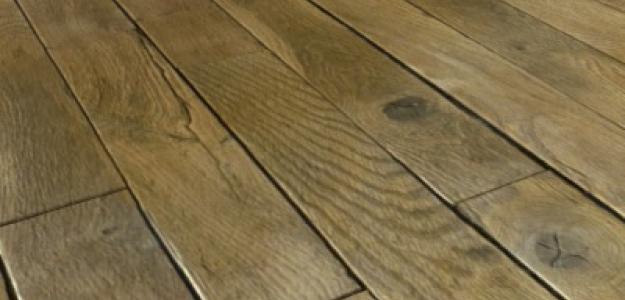
Whether you’re preparing a home for resale or settling in for the duration, refinished hardwood flooring adds beauty to one of the most versatile and practical flooring options available. Although newly finished hardwood floors look elegant, the refinishing process is slightly less so. Many people are so put off by the noisy, messy job that they never dream of tackling the task as a do-it-yourself project. However, it is one that can be successfully completed with the right tools, knowledge and penchant for frugality. After one has committed to saving money on the labor costs associated with hardwood floor refinishing by making it a do-it-yourself effort, a plan is needed to successfully complete the job like a professional. Here is an outline of how to refinish hardwood floors that includes room preparation activities as well as the common materials, equipment and tools needed for the job.
A soft, matte finish is a great new look for hardwood, like the homes from Amaris Homes.
Preparing the Area
When a floor is buffed or sanded, there is a good deal of dust and debris generated. The best way to prepare the room is to remove as many items from the room as necessary. Then the room doors should be covered from top to bottom with plastic sheeting or cloth. After sealing up the entry ways, make sure to cover the supply and return air ducts with plastic sheeting or other materials to avoid distributing dust throughout the house. The home’s heating and cooling system should be turned off while ducts are covered since most home warranties do not pay for the type of damage to HVAC systems caused by operating the units in this manner. Additionally, wax and oil soap build up must be removed prior to buffing hardwood floors.
Equipment, Tools and Materials
The equipment, tools and materials needed to refinish hardwood flooring depend upon the floors’ condition, wood species and finish type. Hardwood floors normally have several coats of original finish like a penetrating stain or varnish as well as a top coat. A close inspection of the flooring allows one to determine whether its top coat is simply damaged or if the wood itself has been marred. If the damage is only to the top coat, then one can rent a buffing machine to remove the top coat, smooth the flooring and prepare it for a new top coat finish. Otherwise, the job will require a full sized sanding machine and an edger to reach the areas that a full sized sanding machine cannot access; both pieces of equipment can also be rented by the hour. Sand paper textures of fine, medium and course grits are needed for the job depending upon the type of finish being removed from the flooring as well as its species of wood. Refinishers often start with coarse and move on to finer grit sand paper as the job progresses; the objectives are to create a flat floor that is free from old stain and finishes. Filler can then be applied to cracks, indentions and other imperfections, and the floor should be sanded again for a smooth look. Stains and finishes are applied to give floors the desired color and to protect them from extreme wear and tear until the next refinishing session. Since the refinishing process is extremely messy and loud, do-it-yourselfers will need protective items like ear plugs, respirator face masks, rubber gloves, eye protection, a utility vacuum and plastic sheeting to cover entry ways and furnishings.
Sanding, Buffing and Refinishing
Operating the drum sanding machine requires a steady hand and technique to avoid costly mistakes. One must lightly tilt and move the sanding machine in a straight line in both directions until the entire floor has been sanded. After the process is completed, one should use the edger to sand the room’s corners, closets and other hard to reach places. Wood stains and finishes are then applied to the flooring. A refinishing job that requires only buffing can be completed with a clear coat or two of polyurethane.
Honey-colored wood in wider planking is a popular look, like the kitchens from Paulson Construction.
Common Mistakes To Avoid
Standard sanding machines require at least 20 amp circuits to operate, and some older homes cannot easily accommodate this requirement. Another key mistake to avoid is leaving the drum sanding machine on while it is remains in one spot on the hardwood floor. This causes the floor to have drum marks, ridges and hollowed out spots that cannot be adequately repaired; the shiny flooring is unforgiving when it comes to such flaws. The other common mistake to avoid is not allowing the stains and finishes to thoroughly dry between coats. Additionally, one of the most unsightly mistakes is allowing the dust and debris from the sanding to stick to finishes before the floors fully dry.