How to Create Stenciled Wall Art
Written by Katy Baar, Parade of Homes Style Editor
One of the best things about the Parade of Homes is the inspiration that awaits you as you tour! There are so many beautiful homes to see and hundreds of design ideas to influence your current living space, future home, or anywhere in-between.
Two homes caught my eye this year for their design styling and originality. The impressive stenciled wall art at homes #242 and #342 is a must-see this spring (learn the application process below).
Home #242 by JMS Custom Homes
Home #242 features 4 bedrooms and 4 bedrooms with views of the Credit River Preserve in Savage.
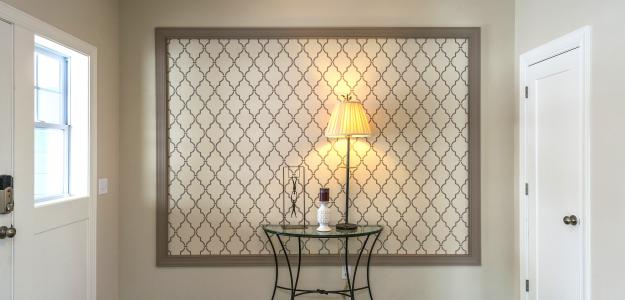
Now here’s one way to make a grand entrance! JMS Custom Homes created beautiful wall art in the entryway of home #242. The simple damask pattern is stenciled onto the wall and framed with trim.
Home #342 by JMS Custom Homes
Home #342 boasts 5 bedrooms & 4 bathrooms in the Dutch Lake Knoll neighborhood of Minnetrista.
JMS painted the wall one color and stenciled a circular motif design in another color with a gloss finish to add sheen and texture to the design.
Here’s How to Achieve The Look:
- Install drywall to wall
- Recess the stencil in the drywall
- Apply another layer of drywall as a border to accentuate the stencil. If desired, use trim to frame the wall.
- Paint the wall one color and the stencil pattern in another color
- Use gloss paint if you want to see a sheen or texture difference
- JMS met onsite with a stencil painter to ensure on-center application within the ‘frame’
JMS weaved this design throughout the home by creating light fixtures to match. At home #242 you’ll find the matching semi-flush light in the foyer, and in home #342 the matching light is found in the study.
See it for yourself during the spring tour, on now through March 29, 2015.